It's officially September! For most, this marks the beginning of a new school year. Including our furbabies! Training your cat is always a good idea, whether you just brought home your first kitten or you want to give Fluffy a refresher course. It's a well-known myth that cats can't be disciplined or taught commands. In reality, they're actually receptive to training, being the smart animals they are! It might seem like an impossible feat at first, but any cat can learn good manners with enough patience and consistency.
Ideally, cat training should start as soon as you bring your kitty home. Establishing boundaries from the get-go will ensure Cookie grows into a well-behaved house cat. This will also make communication between you two strong and smooth. That being said, it's never too late to teach an adult cat a few new tricks or even correct certain bad behaviors. From infants to already weaned kitties, here's your ultimate guide to cat training school!
The golden rules of cat training
Disciplining your cat can be overwhelming and time-consuming. So it's normal to get frustrated at times. However, the #1 thing to keep in mind is that you should never get angry or physical with your cat.
The golden rule of cat training: Do not punish the cat.
Cats do not respond to punishment and doing so will only cause it to be scared, avoid you and eventually turn sour. According to Dr. Susan G. Friedman, animal behavior analyst and professor at the Department of Psychology Utah State University, the key to changing behavior is changing conditions. She explains that "there is an inherent connection between an animal's behavior and the environment in which it behaves."
When trying to disciple your cat, there's three directives you might consider following:
1. Positive reinforcement
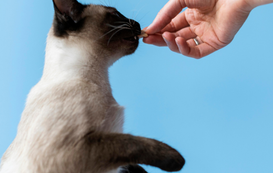
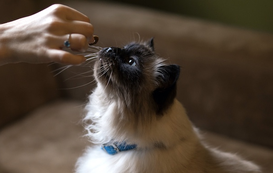
This is key. Rewarding good behavior is the easiest and quickest way to train your furball. Food is usually the best tool for this, but you can also use toys or attention (i.e. cuddles, caresses, brushing). When misbehaving occurs, simply walk away and ignore the cat. When they're doing something positive, reward them. This will help Fluffy associate a desired action with a positive response. The idea is to give your cat a reason to keep behaving in a good way.
2. Consistency
Repetition is the mother of all learning, right? All of the following lessons might occur daily and in a specific way every time. Establishing a routine and sticking to it will help your cat be less confused or chaotic. Learning when to expect food, when to go to sleep, when playtime happens, etc., will help both of you in this journey. Your cat needs to learn that behavior X will always receive response Y.
3. Patience
Again, training a cat is hard work, but not impossible. It'll take a lot of trial and error. So don't give up! A good tip is to try out different things and observe your cat's reactions. How did it respond when you did A or B? What motivates it? Is it food, pets, toys, catnip? If it helps, you can even keep a journal. Consider also including positive milestones and celebrate your purrogress!
Training an infant kitten (< 8 weeks old)
Usually, the mom will teach a kitten some basic lessons, like how to jump, clean itself or how not to play too rough. Experts agree that kittens should not be removed from their mother before they're weaned. This period is when the most fundamental teaching happens, basically it's when cats learn how to cat. Taking a kitten from its litter too soon can have detrimental consequences on its health and social skills. Unfortunately, sometimes the mother is unable to take care of her offspring. If this is the case with your kitten, buckle up. You will need to start at the very beginning.
Lesson 1: Eating solid food
The process of weaning a kitten typically takes 4-6 weeks. They should be ready to go on a solid diet at 8-10 weeks old. To start the transition from breast or bottle feeding to solid food, give your kitten warm (not hot!) milk from a shallow bowl. Make sure it's milk replacer and not cow's milk. Give your kitten time to eat on its own pace, don't push or force feed it. You can also dip your finger in the milk, let the kitten sniff it and guide it towards the bowl. If that doesn't work, continue to bottle-feed but always offer the bowl as a first option.
Introduce solid food by making gruel. This is what kittens eat. You can make your own by mixing milk (again, not cow's milk) with kitten-appropriate food. As your furball grows, reduce the amount of milk and add more solid food to the mix, eventually eliminating the liquid all together. At 10 weeks old, you can start offering dry food only. Just make sure to always have a bowl of water next to it.
Lesson 2: Litter box training
When I brought home my 2 month-old orphan kitten, I was amazed at how he just knew to use the provisional cardboard litter box. He just hopped in, cried, and pooped! Normally, cats have a natural instinct to eliminate on sand or other loose material like dirt. Chances are, you won't even have to potty-train your kitten. But there's a few things you can do if it's an issue.
First, make sure the litter box is kitten-appropriate. Pick one that's not too big or bulky. It's also best to avoid closed boxes with doors that can confuse your kitty. The type of litter sand is also something to consider. Next, find the right place for the box and avoid moving it. Choose an easily accessible and quiet room. Your little buddy needs to know that it can get there easily and no one will bother it.
You're now ready to begin litter-training. Have your cat follow you to the box or place them in front of it. A little trick I've used in the past is to dig a finger in the sand (assuming it's a fresh batch or not too soiled) and start scratching. You can even take your kitten's paw to do the digging. Gently motion your cat to get in and offer a treat when they do. That way the box area is associated with positive feelings. This is how you'll get your furball to keep using the litter.
If that doesn't work, combine the reward with a sound using a clicker. Clickers are a great tool for associating desired actions with rewards. Try this: the moment your kitty uses the bathroom, press the clicker and offer a treat. The sound should be generated at the very moment the desired action occurs.
Repeat this process a few times during the day: after meals, naps and playtime. If an accident happens outside the box, don't punish your cat. Just make sure to clean up the mess really well. You don't want your kitten to leave its scent in a specific part of the house and make that the designated spot.
Lesson 3: Learning not to bite
Repeat this process a few times during the day: after meals, naps and playtime. If an accident happens outside the box, don't punish your cat. Just make sure to clean up the mess really well. You don't want your kitten to leave its scent in a specific part of the house and make that the designated spot.
Perhaps the most important lesson here will be to never let your kitty play with your bare hands and legs. I know, I know. It's simply irresistible when they're tiny and nibble on your pinky. But you don't want them to carry this habit into adulthood. So always use toys, never your hands.
When your cat bites you, make a short, loud "ouch!" sound and slowly move your arm away. Then get up and leave the room. This signals that playtime is now over. The key here is consistency. Always do this as soon as your kitten bites. This will teach them that biting equals end of play.
Use the same technique for an adult cat that hasn't learned not to bite. It might take longer to break their old habit, so don't feel discouraged. Playtime can also be less often, since energy lowers as the cat grows older.
Lesson 4: Teaching not to scratch the furniture
Another common issue is scratching on the furniture. Remember that clawing is a natural need for cats and won't stop no matter how much you punish them for it. The idea here is to make the scratching pole more enjoyable and fun than the couch.
Start by placing a scratching pole next to where Fluffy usually sharpens his nails. As soon as he approaches the "forbidden" spot, redirect him to the pole. You might literally have to place his paws on the post and make a scratching motion. You can even sprinkle some catnip or put his favorite toy nearby. When he finally uses the pole, reward him. Remember, your cat needs a reason to keep coming back to the post and associate it with a positive feeling.
Training a weaned cat (>8 weeks old)
If your cat is already weaned, most of the hard work is done for you, yay! So we can now move on to the more "advanced" groups.
Lesson 5: Socializing your cat
Teaching social skills to a kitten or an older cat is a vital part of their training. Spend a lot of time with your cat to create a strong bond, especially in the early stages of your relationship. Your cat should also meet a variety of people early on in its life. This will teach them confidence and emotional independence, but also not to be afraid of strangers, which can be helpful during vet visits or if Cookie ever gets lost.
Cats should spend some time getting used to their owners before being introduced to other domestic animals. For an in depth guide on bringing a new cat into the house, read this article. According to Miranda Workman, a professor in Animal Behavior, Ecology and Conservation at Canisius College "socialization with non-cats should begin no later than week five".
Once your kitten is used to being held by you, it's time to meet some new faces! Ideally, introduce people of different genders, ages and appearances. Make sure to remind your friends and family - especially children - to be gentle and calm when handling your kitty. Remember that forcing a cat into something will only make them avoidant.
A good trick is to turn meet and greets into a play session. Have the person stand across the room and dangle a toy. Entice the kitty to come towards the person, instead of the opposite. That way your fuzzy buddy can meet the stranger at their own pace.
If playing doesn't work, try again next time with treats or whatever your cat responds to best. Every time someone comes into the house, call your kitty over to the door and have the person offer a treat. You want to create positive memories during this first experience.
Lesson 6: Learning their name and other commands
Once your furball has mastered the above, it should be ready to learn some more advanced skills. Okay but seriously now, cats can learn to play dead and stuff? Yes, it's possible! While it does take a lot of effort (and maybe a few tears), teaching commands is definitely something you want to invest time and energy into.
Did you know that cats respond well to the sound 'ee'? This is why names that include this sound are often a top choice! But regardless of your cat's name, teaching it to come when called requires the same training as in the lessons above.
Your cat probably recognizes the sound of the food bag or bowl. You can use this. Shake it while saying your cat's name paired with a phrase like "come here". It can even be a made-up-sound. The important thing is that you chose a distinctive word; one that you wouldn't just use everyday in a normal conversation. At first, your cat will probably respond to the sound of the food bag rather than the name, but that's okay. Reward her with a small treat when she comes over.
Next time, try calling her name first. As soon as she comes over, shake the bag or use a clicker to mark the moment the desired action happened. Then give her a treat. With enough repetition, your kitty should soon come to you. Keep in mind that it's not a good idea to trick Fluffy by calling him over to give him medicine or put him in the carrier. This can undo all your hard work by associating his name with a negative experience.
Use the same technique for any other trick or command. To teach it how to sit for example, stand in front of your kitty and say "sit!". Once they sit, use the clicker to mark the correct behavior and offer a treat or praise for reward.
Lesson 7: Getting your cat used to a harness
If you want to explore the outdoors with your fuzzy friend, it's recommended to use a harness. Every cat is different and has its own personality. Some are more receptive to the idea of a leash than others. But any cat can get used to it using the technique of positive reinforcement.
Introduce the harness by letting your cat sniff it. Leave it on the floor and give them time to examine it. Be encouraging by praising and stroking your kitty. Next, gently put your cat in the harness without fastening the clasp. Remain calm and reward your kitty with a treat.
This lesson will take time, so it's okay to stop here and try again the next day. Once your kitty is used to being in the harness, you can close the clasp. Again, offer them a reward every time. Once your furball seems comfortable in the harness, have them wear it around the house. Start with a few minutes and gradually increase the time.
After a few weeks, you can try taking small trips outside. Start with exploring your building or just outside the entrance. Remember to bring treats or toys with you and a clicker if you're using one. Next time, you can take them to the car for example. Keep the exploring sessions short, but always give your cat time to sniff around. You can now slowly explore other locations.
Cat training is hard work, but not impossible.
Staying sane during kitty training can be a challenge. So remember to breathe, take a step back, reward yourself (not just Fluffy) and try again. If your furball is currently attending training school, be sure to let your cat sitter on Meowtel know during a meet and greet. Sitters on Meowtel will always do their best to accommodate your needs.
Ready to find the purrfect sitter for your feline friend? Find a cat sitter on Meowtel today!


